Mito Hollyhock vs Sanfrecce Hiroshima Prediction

 Japan · Regular Season - 13


AI Best Pick
Statistical forecasts for entertainment purposes only - not betting or financial advice.
Mito Hollyhock vs Sanfrecce Hiroshima: the result in context
Sanfrecce Hiroshima beat Mito Hollyhock 3-0 in the J1 League on 31 Oct 2026. It was in line with recent form: Sanfrecce Hiroshima had won 3 of their previous five, compared with 1 for Mito Hollyhock.
Sanfrecce Hiroshima tend to win more corners, 8.6 a game to 2.6 for Mito Hollyhock.
Match Forecasts
Match Events
Lineups
 Mito Hollyhock
 Avg ratingAvg rating
 27J. Słowik
 15Y. Kimoto
 17K. Itakura
 16Y. Tamura
 25T. Mase
 19T. Semba
 3K. Osaki
 44M. Nishihara
 22K. Taniguchi
 30J. Okumura
 33P. Ferreira
 1K. Osako
 15S. Nakano
 4H. Araki
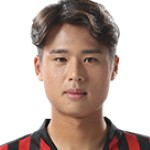 37K. Ju-Sung
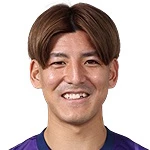 5N. Arai
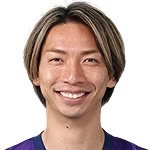 6H. Kawabe
 35Y. Nakajima
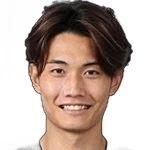 7S. Higashi
 45S. Kobayashi
 10A. Suzuki
 23S. Ayukawa
Mito Hollyhock Substitutes
Sanfrecce Hiroshima Substitutes
Match Stats
Mito HollyhockSanfrecce Hiroshima Team Comparison
Mito HollyhockSanfrecce HiroshimaAI Insights
Game State Tendencies
Mito Hollyhock- Tied at half-time in 60% of matches
- Scores more in 2nd half (0.4 vs 0 in first half)
- Concedes more in 2nd half - can tire late
Sanfrecce Hiroshima- Tied at half-time in 40% of matches
- Scores more in 2nd half (2 vs 0.4 in first half)
- Concedes more in 2nd half - can tire late
Recent Form
Mito HollyhockMito Hollyhock Cerezo Osaka
 FC TokyoMito Hollyhock
 Fagiano OkayamaMito HollyhockMito Hollyhock
 UrawaMito HollyhockFC TokyoMito Hollyhock
 Shimizu S-pulse
 Fukushima UnitedMito Hollyhock
 Yokohama F. MarinosMito HollyhockMito Hollyhock
 Kawasaki Frontale
 Parceiro NaganoMito HollyhockSanfrecce HiroshimaYokohama F. MarinosSanfrecce HiroshimaSanfrecce HiroshimaShimizu S-pulse
 V-varen NagasakiSanfrecce HiroshimaSanfrecce Hiroshima
 Kyoto Sanga
 Matsumoto YamagaSanfrecce Hiroshima
 Tokyo VerdySanfrecce HiroshimaSanfrecce Hiroshima
 Iwaki
 Tochigi CitySanfrecce Hiroshima
 Avispa FukuokaSanfrecce HiroshimaSanfrecce HiroshimaCerezo Osaka
Referee Profile
Compared with other referees
2.63 cards a match, in line with other referees in the same competitions and seasons (2.52).
Cards come from 92 matches with official statistics.
Full referee statsLeague Table
| # | Team | MP | W | D | L | G | GD | Pts | Form |
|---|---|---|---|---|---|---|---|---|---|
| 1 | FC Tokyo | 13 | 9 | 3 | 1 | 31:8 | +23 | 30 | WWDWW |
| 2 | Sanfrecce Hiroshima | 13 | 9 | 2 | 2 | 32:10 | +22 | 29 | WWLWW |
| 3 |  Machida Zelvia | 13 | 8 | 4 | 1 | 30:10 | +20 | 28 | DDWWW |
| 4 |  Kashiwa Reysol | 13 | 9 | 1 | 3 | 29:19 | +10 | 28 | WWDLW |
| 5 |  Vissel Kobe | 13 | 8 | 2 | 3 | 21:12 | +9 | 26 | WDLWL |
| 6 |  Kashima | 13 | 7 | 2 | 4 | 29:22 | +7 | 23 | WLDWW |
| 7 | Kawasaki Frontale | 13 | 6 | 4 | 3 | 27:22 | +5 | 22 | LWWWL |
| 8 | Yokohama F. Marinos | 13 | 5 | 6 | 2 | 20:14 | +6 | 21 | WDDDD |
| 9 | Urawa | 13 | 7 | 0 | 6 | 21:27 | -6 | 21 | LWWWL |
| 10 | Fagiano Okayama | 13 | 5 | 1 | 7 | 15:21 | -6 | 16 | LLWLL |
| 11 |  Nagoya Grampus | 13 | 4 | 2 | 7 | 15:21 | -6 | 14 | LDDWW |
| 12 | Cerezo Osaka | 13 | 3 | 5 | 5 | 13:23 | -10 | 14 | LDDLD |
| 13 | Shimizu S-pulse | 13 | 4 | 2 | 7 | 10:22 | -12 | 14 | LLLDW |
| 14 | Kyoto Sanga | 13 | 3 | 4 | 6 | 17:23 | -6 | 13 | WDDLL |
| 15 | V-varen Nagasaki | 13 | 3 | 3 | 7 | 16:21 | -5 | 12 | LLWLD |
| 16 |  Gamba Osaka | 13 | 2 | 6 | 5 | 14:21 | -7 | 12 | DDWDL |
| 17 | Tokyo Verdy | 13 | 2 | 5 | 6 | 11:22 | -11 | 11 | WWDLL |
| 18 |  JEF United Chiba | 13 | 2 | 4 | 7 | 15:24 | -9 | 10 | WDLDD |
| 19 | Mito Hollyhock | 13 | 2 | 3 | 8 | 12:25 | -13 | 9 | LLLLL |
| 20 | Avispa Fukuoka | 13 | 2 | 1 | 10 | 13:24 | -11 | 7 | LLLLW |
| # | Team | MP | G | Pts |
|---|---|---|---|---|
| 1 | FC Tokyo | 13 | 31:8 | 30 |
| 2 | Sanfrecce Hiroshima | 13 | 32:10 | 29 |
| 3 | Machida Zelvia | 13 | 30:10 | 28 |
| 4 | Kashiwa Reysol | 13 | 29:19 | 28 |
| 5 | Vissel Kobe | 13 | 21:12 | 26 |
| 6 | Kashima | 13 | 29:22 | 23 |
| 7 | Kawasaki Frontale | 13 | 27:22 | 22 |
| 8 | Yokohama F. Marinos | 13 | 20:14 | 21 |
| 9 | Urawa | 13 | 21:27 | 21 |
| 10 | Fagiano Okayama | 13 | 15:21 | 16 |
| 11 | Nagoya Grampus | 13 | 15:21 | 14 |
| 12 | Cerezo Osaka | 13 | 13:23 | 14 |
| 13 | Shimizu S-pulse | 13 | 10:22 | 14 |
| 14 | Kyoto Sanga | 13 | 17:23 | 13 |
| 15 | V-varen Nagasaki | 13 | 16:21 | 12 |
| 16 | Gamba Osaka | 13 | 14:21 | 12 |
| 17 | Tokyo Verdy | 13 | 11:22 | 11 |
| 18 | JEF United Chiba | 13 | 15:24 | 10 |
| 19 | Mito Hollyhock | 13 | 12:25 | 9 |
| 20 | Avispa Fukuoka | 13 | 13:24 | 7 |
Explore more predictions
This match
More J1 League matches
About the Mito Hollyhock vs Sanfrecce Hiroshima forecast
The forecasts for this J1 League match are built from team Elo ratings, recent form, scoring data and the head-to-head record, and are updated as new data arrives before kickoff.
How to Read These Forecasts
Each percentage shows the model's calculated likelihood for that outcome. Above 65% indicates strong statistical confidence; 45-65% reflects a competitive, open match; below 45% suggests the outcome is statistically less likely. All figures are for informational and entertainment purposes only.
Mito Hollyhock and Sanfrecce Hiroshima in the J1 League table
The table shows a wide gap: Sanfrecce Hiroshima are 2nd in the J1 League, while Mito Hollyhock sit 19th, 20 points behind. League goal record so far: Mito Hollyhock 12-25, Sanfrecce Hiroshima 32-10. The full standings are on the J1 League Table 2027 page.
Key Factors for This Match
Mito Hollyhock and Sanfrecce Hiroshima have little recent head-to-head history for the model to draw on. This forecast is based on a complete recent-form dataset for both teams.
All forecasts are generated by statistical and machine learning models for informational and entertainment purposes only. They are not guaranteed and do not constitute financial or betting advice.